
Intro To AI
 NYP-AI
Intro To AI - This weekend on 14th May 2022, NYP AI hosted its second event covering the basics of AI to spark interest in beginners. We covered where Machine Learning can be applied, the 3 main areas of Machine Learning, Training a Image Classification Model with Teachable Machine and more...
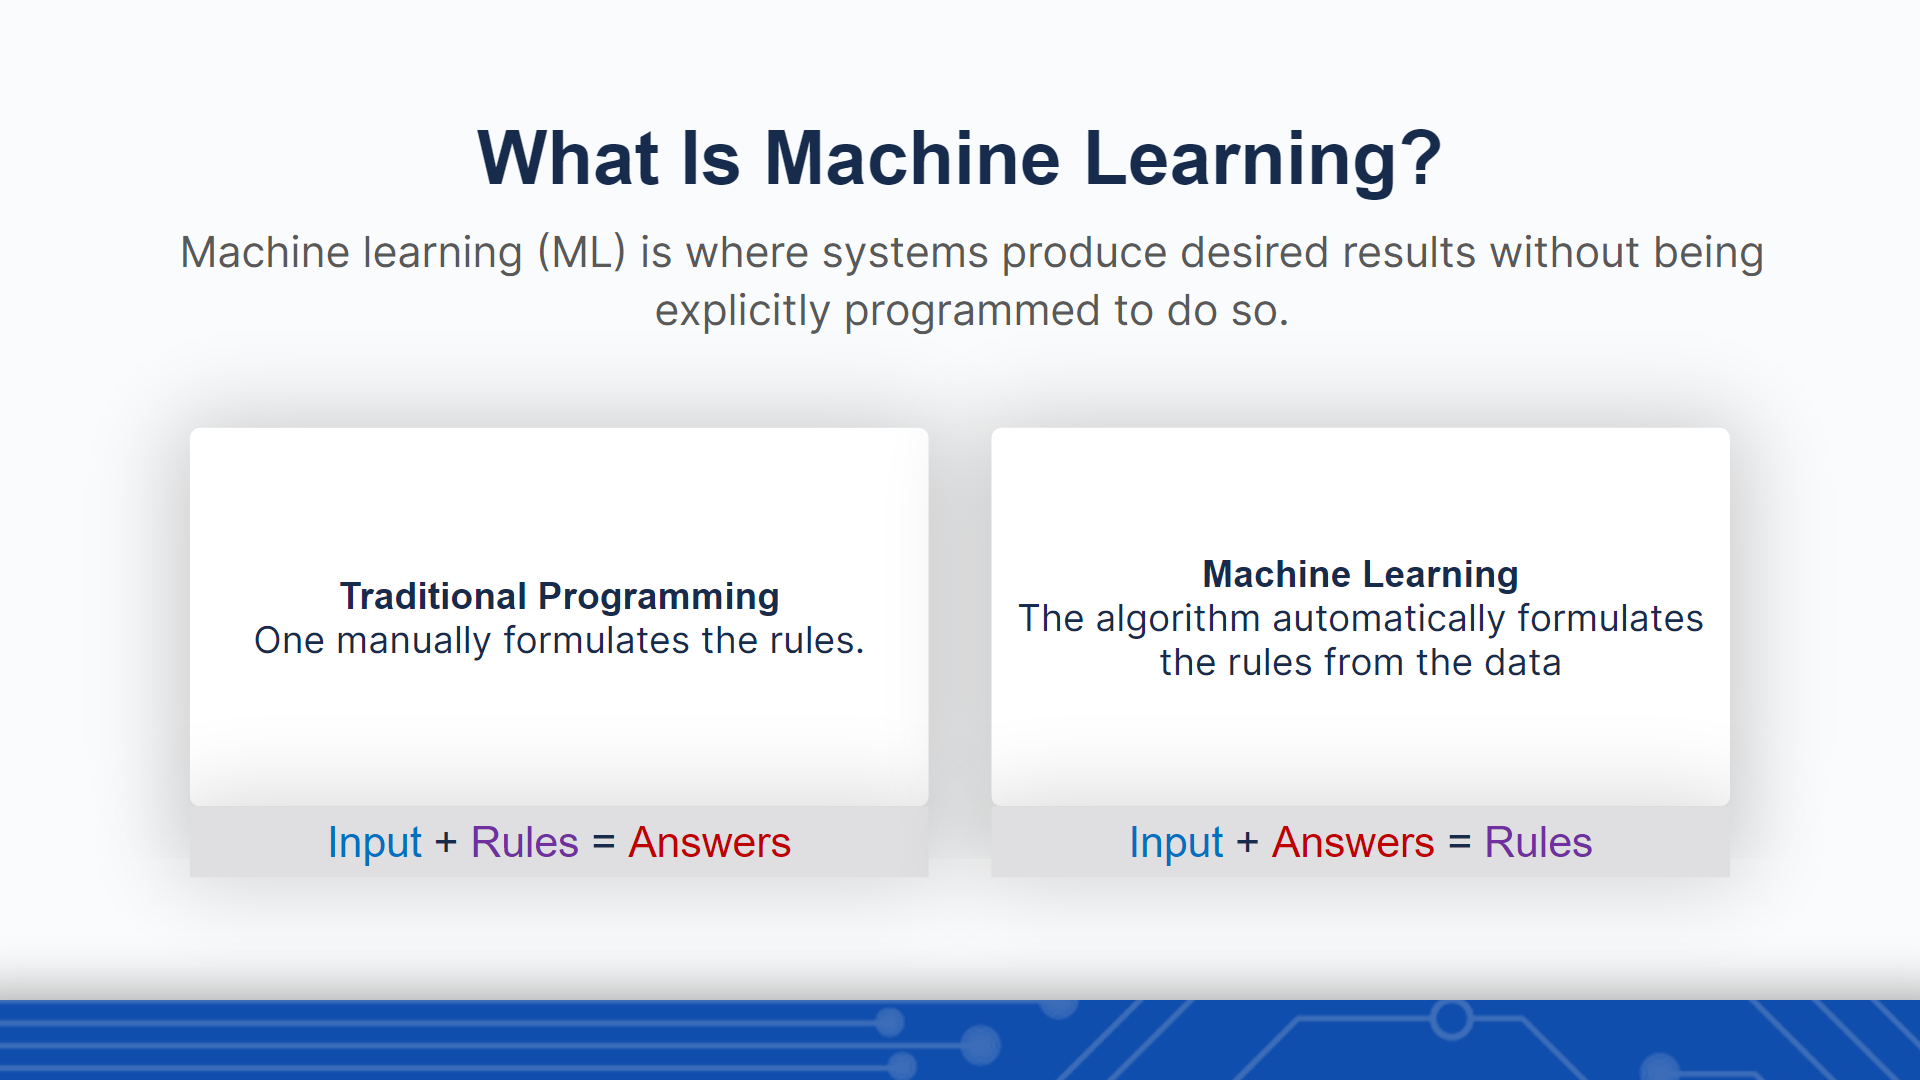
After learning about real-life examples of machine learning through discussions with the help of Mentimeter, we introduced Machine Learning in a way that's easier to comprehend by comparing it to Traditional Programming.
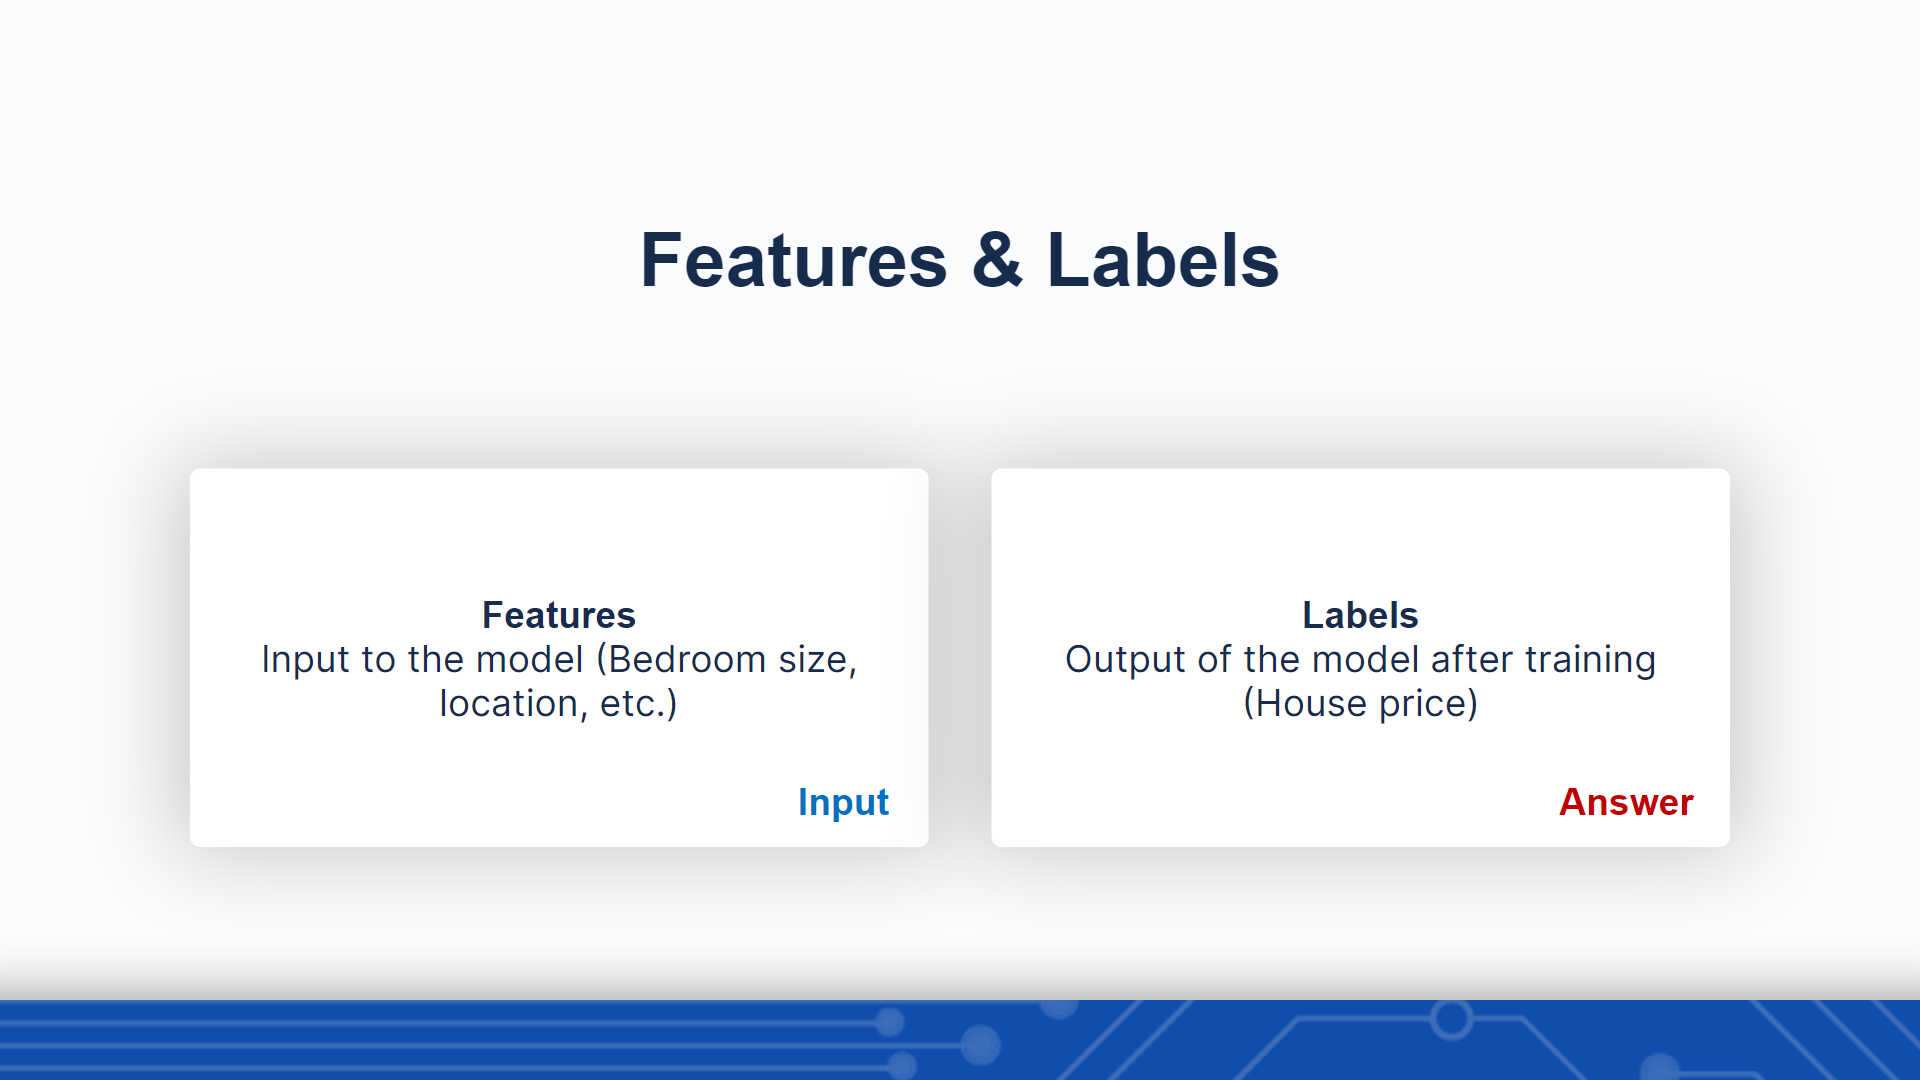
Then, we covered what features and labels meant in the context of machine learning with the example of Predicting Housing Prices. Once again we went back to Mentimeter for further discussions on examples of features and labels, where Email Body is the feature and whether it's spam or not is the label in the context of Email Spam Classification.
Additionally, we went through the 3 main types of Machine Learning, Supervised Learning, Unsupervised Learning and Reinforcement Learning highlighting examples for each of them and the differences between them allowing members to get a good grasp on Machine Learning as a whole.

Finally, we ended the first part of the session with the Machine Learning Pipeline to encapsulate what was learnt and show how it applied efficiently in the real world. At this stage, participants were able to ask questions to clarify their doubts about any part of Machine Learning.
Computer Vision
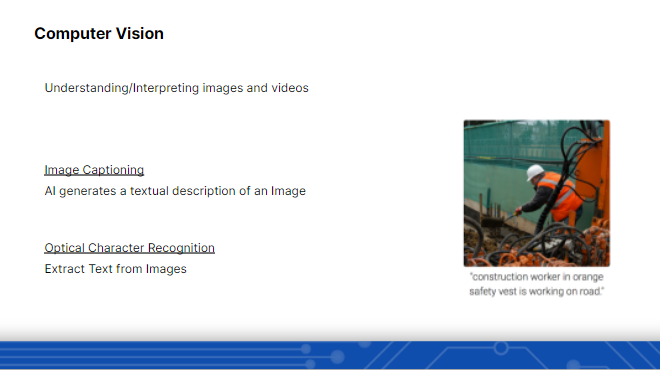
For Computer Vision, we started with what's Computer Vison about and explained Image Captioning and Optical Character Recognition. We also gave an example of how the image in the slide would be read if we used Computer Vision. From here we moved on to how an image is represented in a NumPy array to computers.
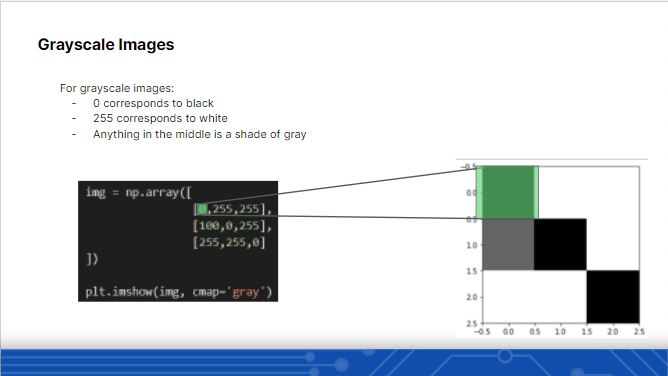
For Grayscale Images; 0 corresponds to black, 255 corresponds to white and anything in the middle is grey.
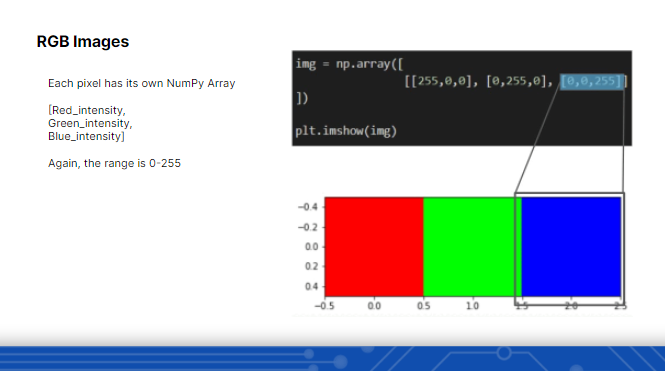
For RGB images, each pixel has its own NumPy array which contains [Red Intensity, Green Intensity, Blue Intensity] which also contains the range of 0 - 255. At this stage, members were able to ask questions to clarify their doubts on any part of Computer Vision. Even though the introduction to Computer Vision was short, it was succinct participants were able to learn the essence of it.
Image Classification
So, what is image classification? Simply put, it is a supervised learning technique to train a model to recognize labelled pictures.
The following pipeline below illustrates the steps in image classification:
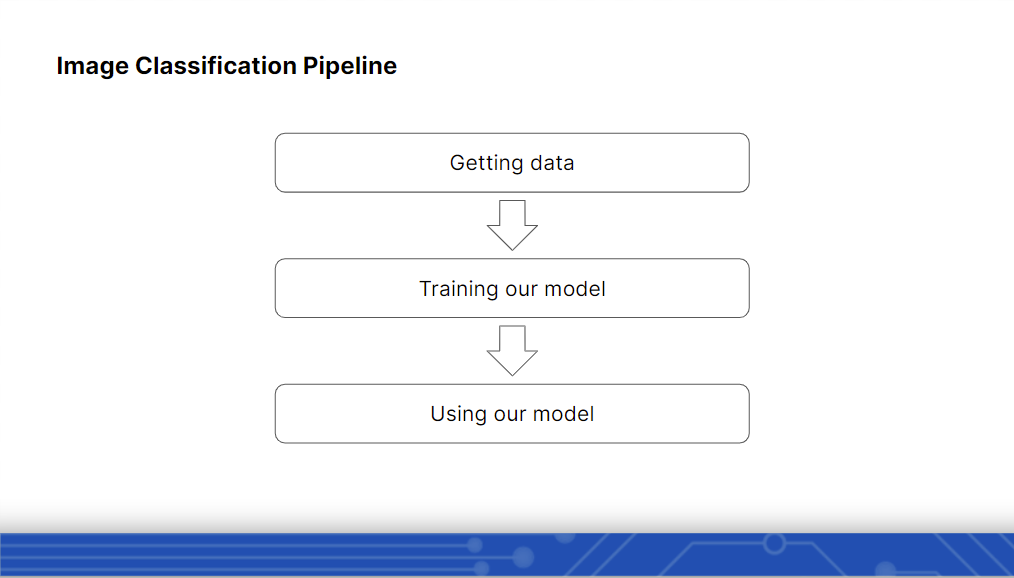
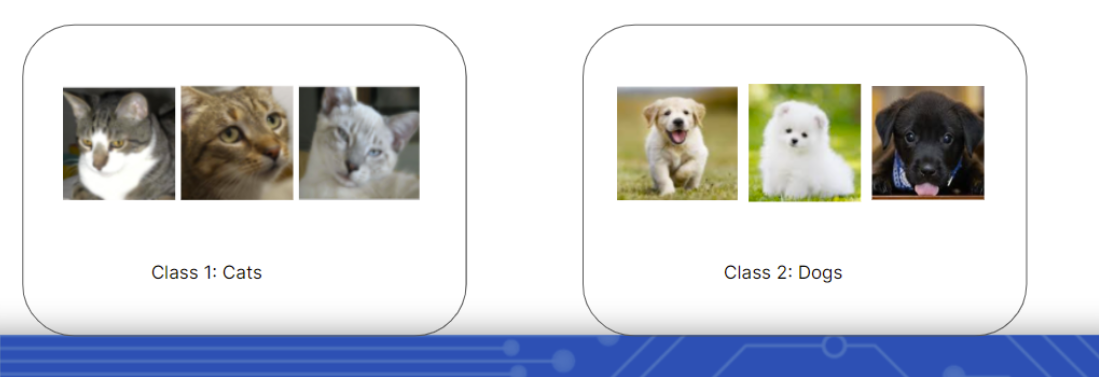
To start off, the first step would be to gather data. If we want to train a model to classify between cats and dogs, you would have to download some images of those pets from the internet.
Afterwards, we also need to define the labels for each class:
Second, we will make use of the data we gathered earlier to train the model.
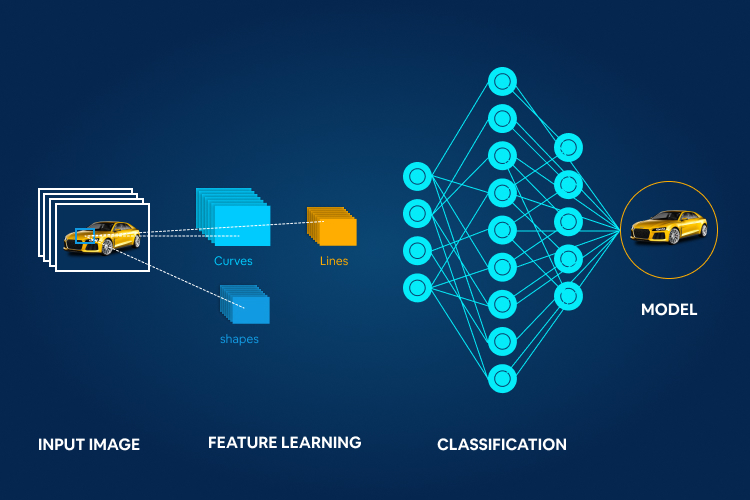
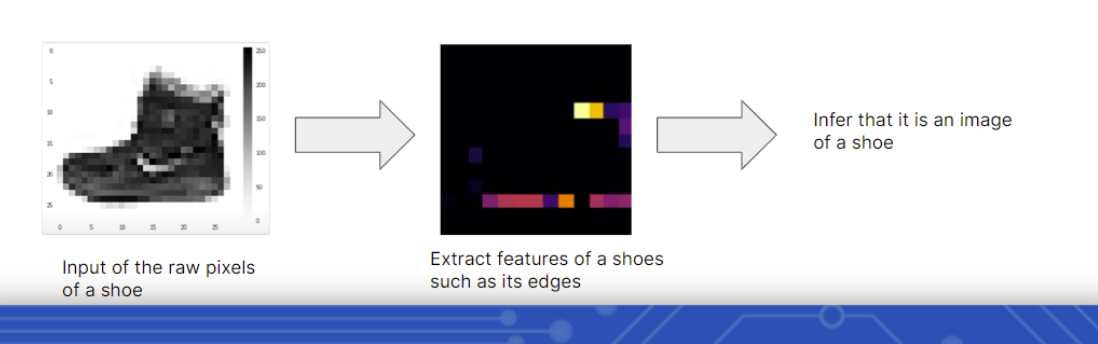
A model is trained by extracting key features of an image.
Suppose that we are training a model to classify a shoe, when the picture is processed, it extracts features such as the edges of the shoe. By doing so, the model will use that to determine whether an image passed on to it, belongs to a shoe class or not.
Now that the model is trained, we are ready to test the model! Let us take the earlier example of classifying cats and dogs. To test the model, simply upload new images of these pets and see if the model can classify those images correctly.
Teachable Machines
It's time to put the knowledge we acquire into practical use. We are all familiar with the childhood game "Scissors, Paper, Stone", in this session, we will use teachable machines to train an image classification model to differentiate between paper and stone.
Teachable machine is a platform which makes it easy to create your ML model without any coding any line of codes, all you have to do is to click a few buttons and you are ready to go with your very first model :D
Click on the following URL to the image classification page:
https://teachablemachine.withgoogle.com/train/image
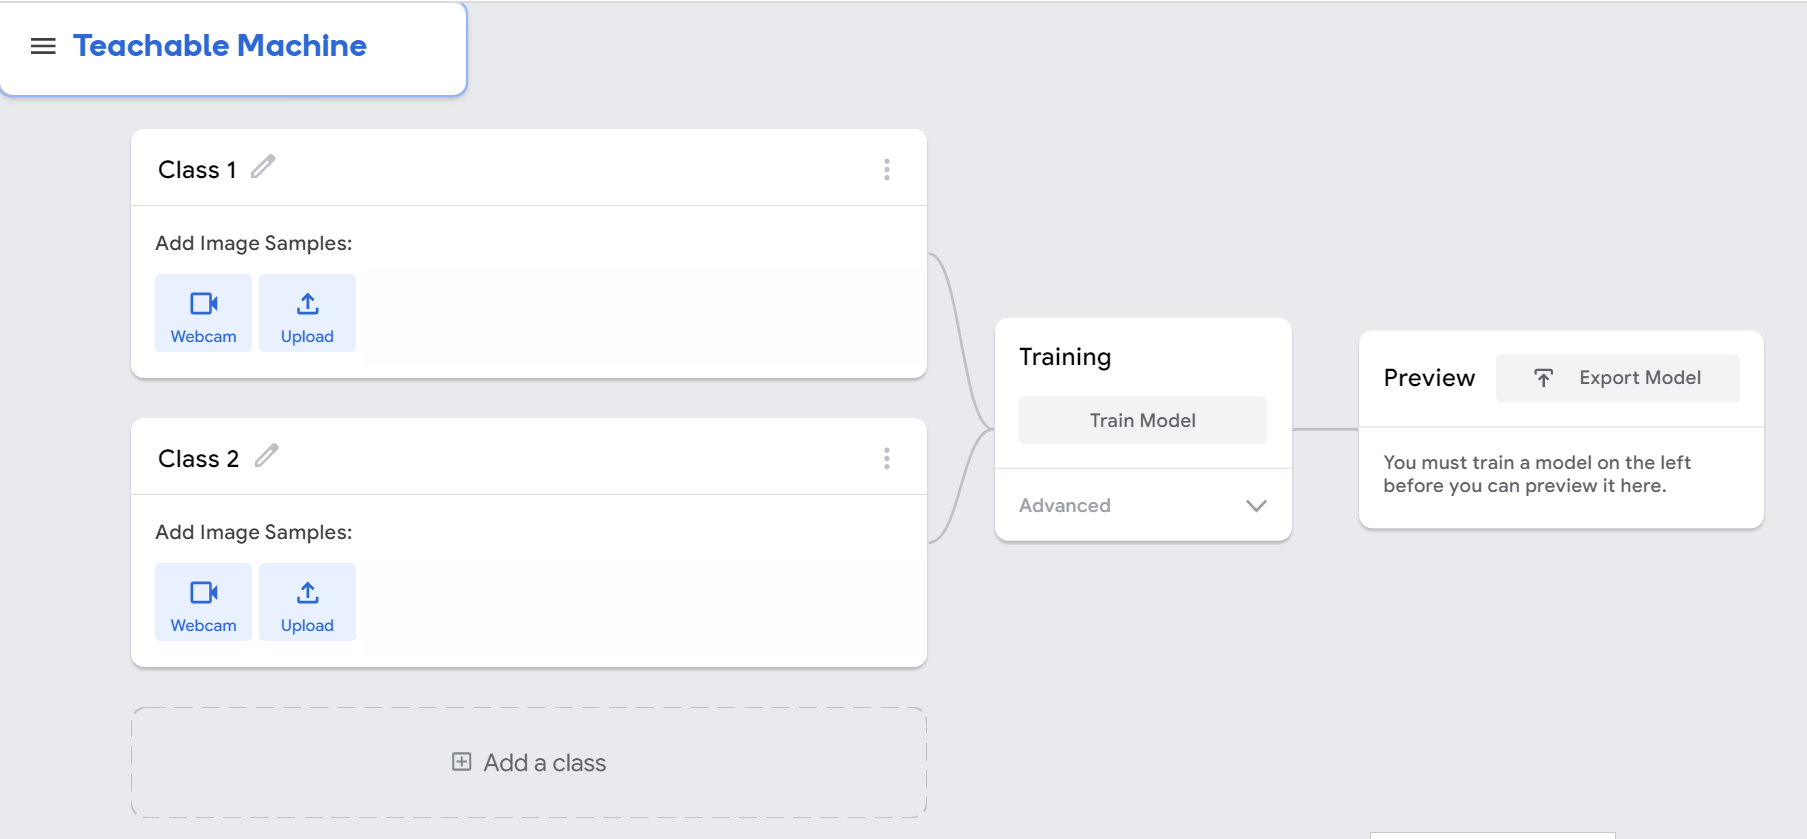
The interface can be broken down into 3 sections, starting from the left, it is where you define your classes and upload your data into the model.
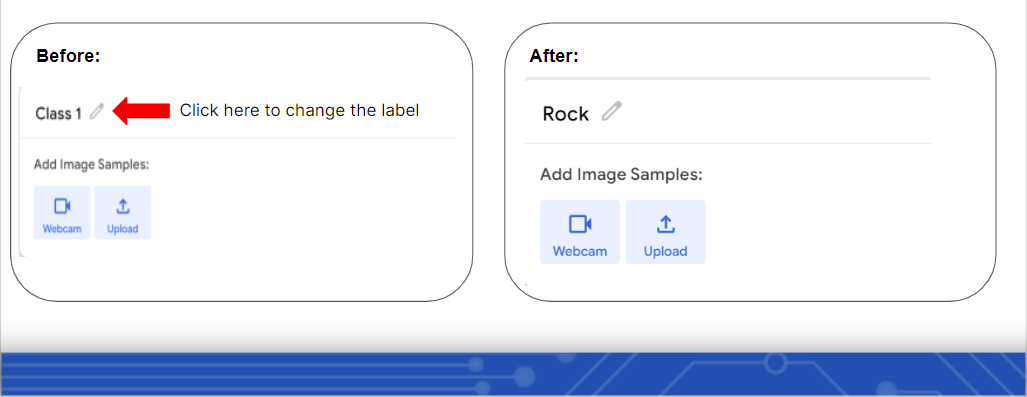
Click on the pencil icon to edit the name of the class, change it "Rock". Similarly, change the name of the second class to "Scissors".
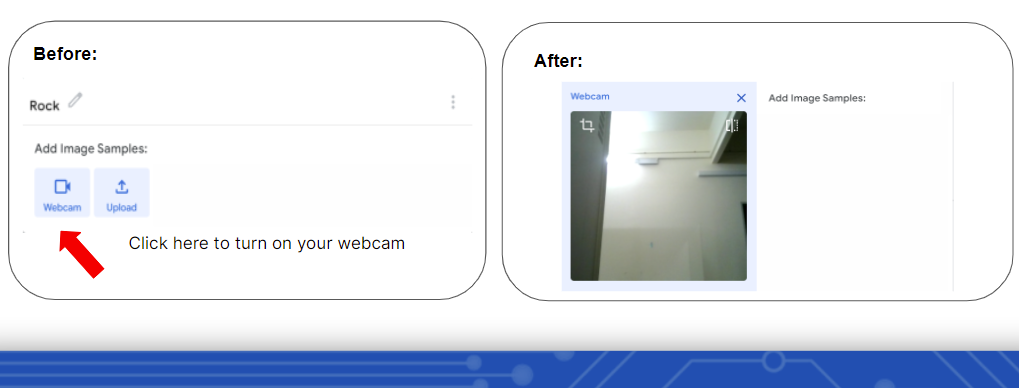
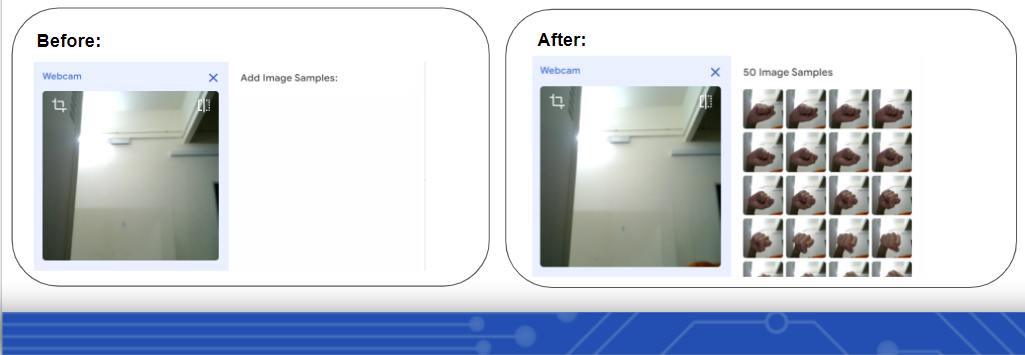
The next step would be to turn on your webcam, and click on the "webcam" button. By turning on our webcams and forming the shapes of paper and stone using our hands, we can input these images into the model in real-time.
Afterwards, to form the shape of a rock, raise up your hand and clenched your fist. Click on the "hold to record" button to begin collecting data.
It is recommended to capture a similar number of data, if you capture 100 sets of rock data, try to capture around 100 sets of paper data as well.
*Note to rotate your fist at different angles so as to capture a more diversified set of data. To diversify the data, even more, you can move it around your hand instead of statically leaving it in the same position*
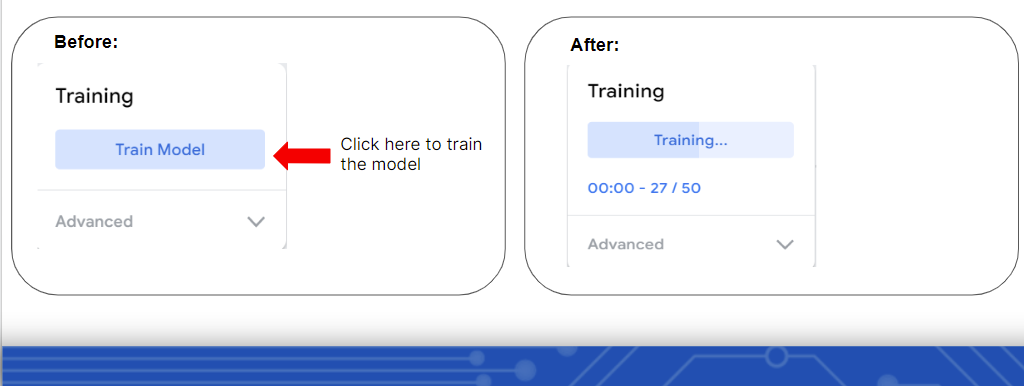
After collecting data for both rock and scissors classes, the next step would be to train your model.
Under the “Training” Tab, click on the “Train Model” button to start training your model.
Important: You must leave the tab open for the model to train
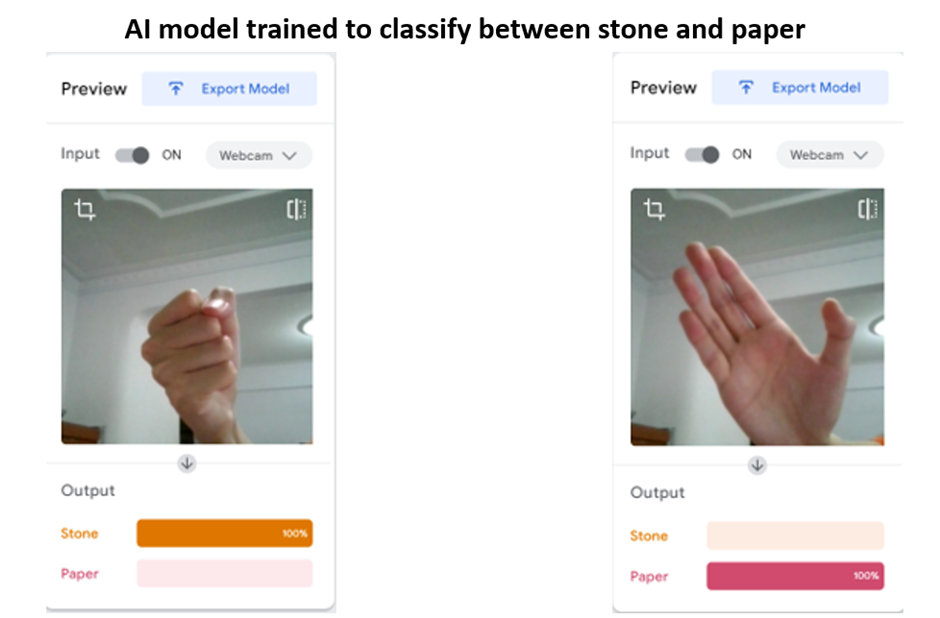
For the final step of this practical session, we have to test the model to determine its accuracy in classifying the different classes. Form the shape of stone and paper and rotate them at different angles or move your hand around in a different position to test it.
The output section is the confidence level of the model in classifying the classes.
If the model is not accurate in classifying some variations of the data, do consider adding more diversified data to improve its accuracy. However, the drawback of adding more data would be that it would take a longer time to train the model.
Hope you have learned something and had fun training your very first image classification model!
We will be back with more interesting content in the future, stay tuned!
