Let's Talk NLP
 NYP-AI
On 16th July 2022, NYP AI hosted its 2nd NLP event where participants had a great time creating their own Spam Classification Model. We covered an intro to Machine Learning, Data Preprocessing, Training our own NLP model, Deploying the Model with Flask and using Hugging Face APIs for semantic Analysis.
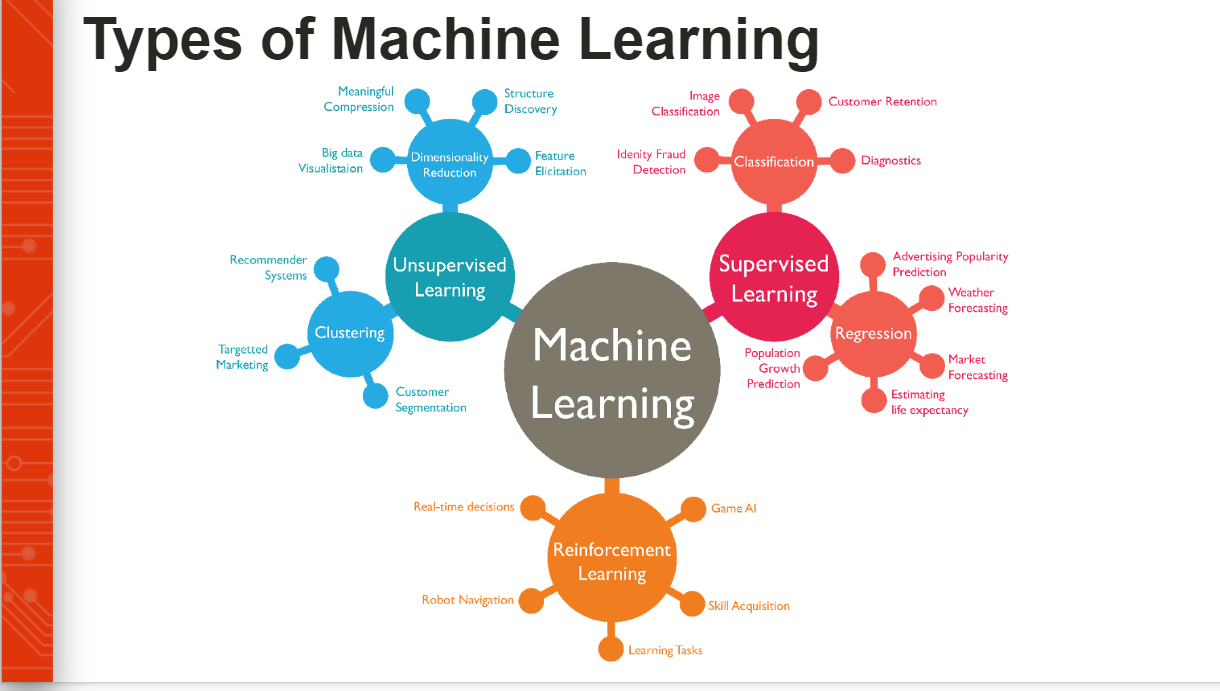
We kickstarted the session with a quick introduction of Machine Learning and we covered the different types of Machine Learning- Supervised Learning, Unsupervised Learning and Reinforcement Learning while highlighting examples for each of them and the differences between them allowing members to get a good grasp on Machine Learning as a whole.
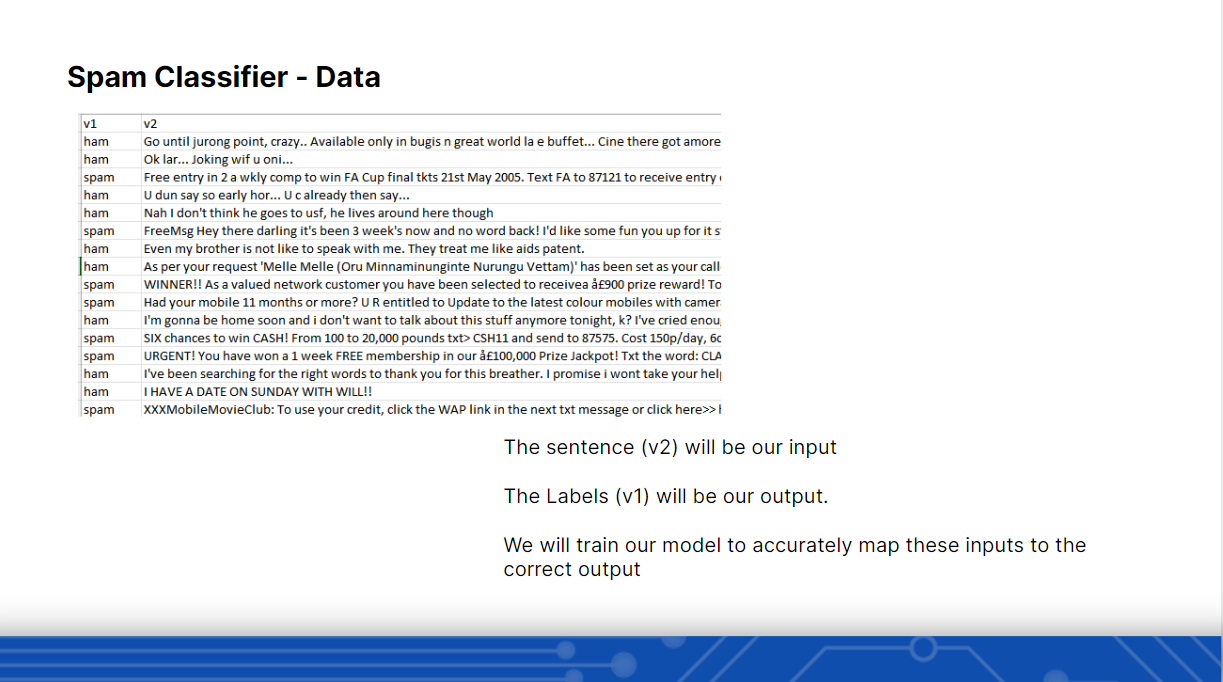
After the introduction of Machine Learning, we went through the Spam Dataset and explained the columns. The Dataset had a total of 6k Data and they will be fed into the model.
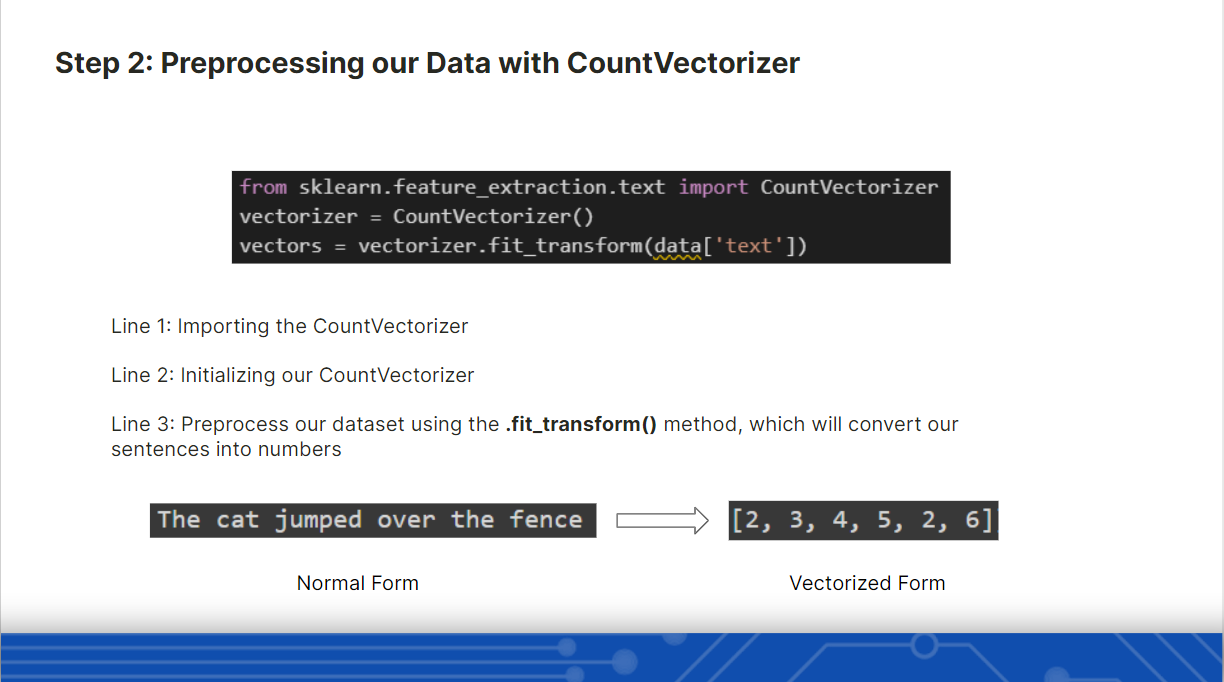
After getting a clear understanding of what the spam.csv contained. We proceeded with Data Preprocessing where we used pandas to remove the remove extra columns and rename them. After that, we used the Countvectorizer from Sklearn to convert words into vectors.
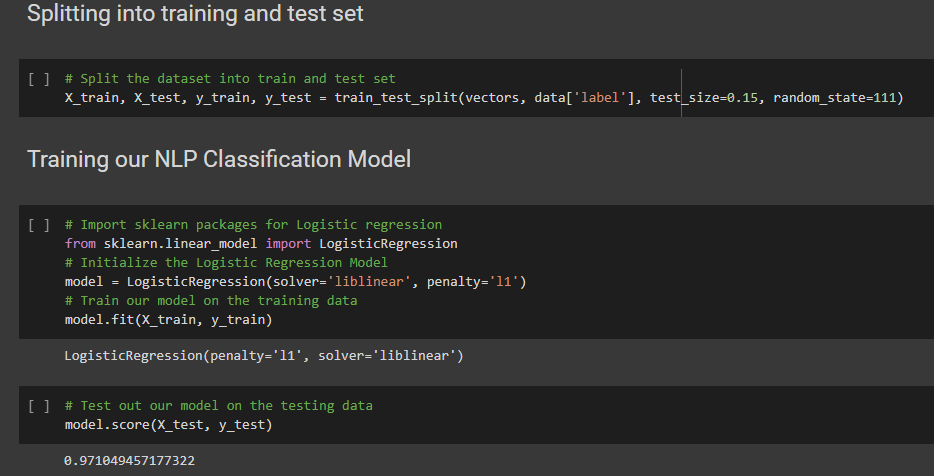
Once we preprocessed the data, we split the data into a train and test set. From there, we proceeded to train our model using Logistic Regression from Sklearn as well. Then we tested out our model using the data from the test set.
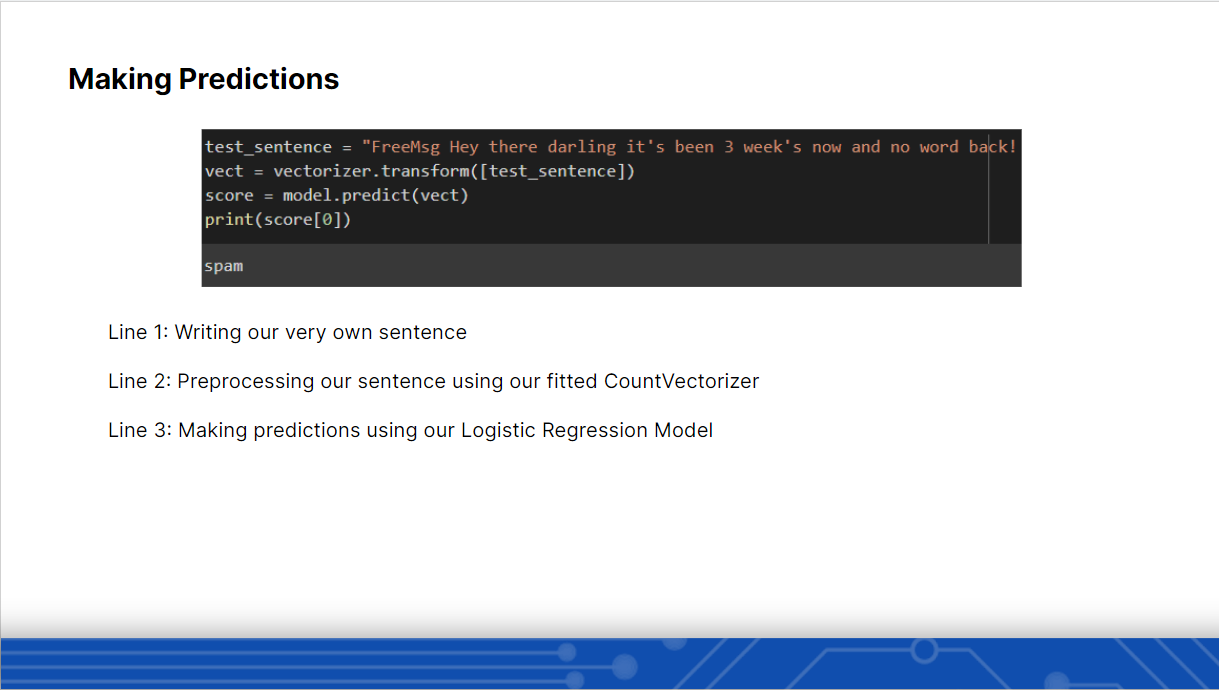
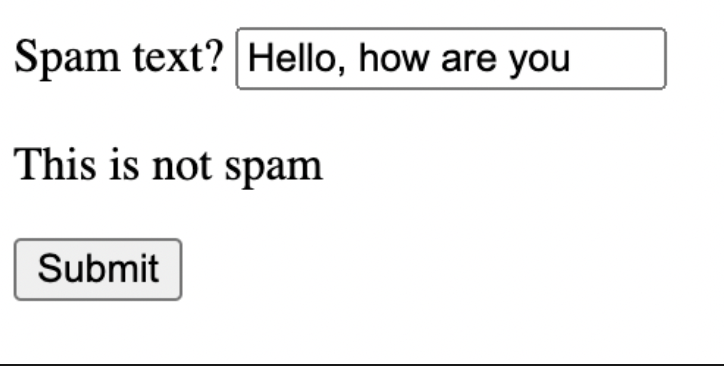
Lastly in the pipeline overview, we moved to Generating Predictions. As a human, we tend to make mistakes and it would take us a long time when we try to analyze a huge data set and make predictions, however by using ML we can save a lot of time and there will be close to 0% errors. The participants also got the chance to create their own text sentence and check out if their sentence is Spam or Ham by using the model and vectorizer from earlier.
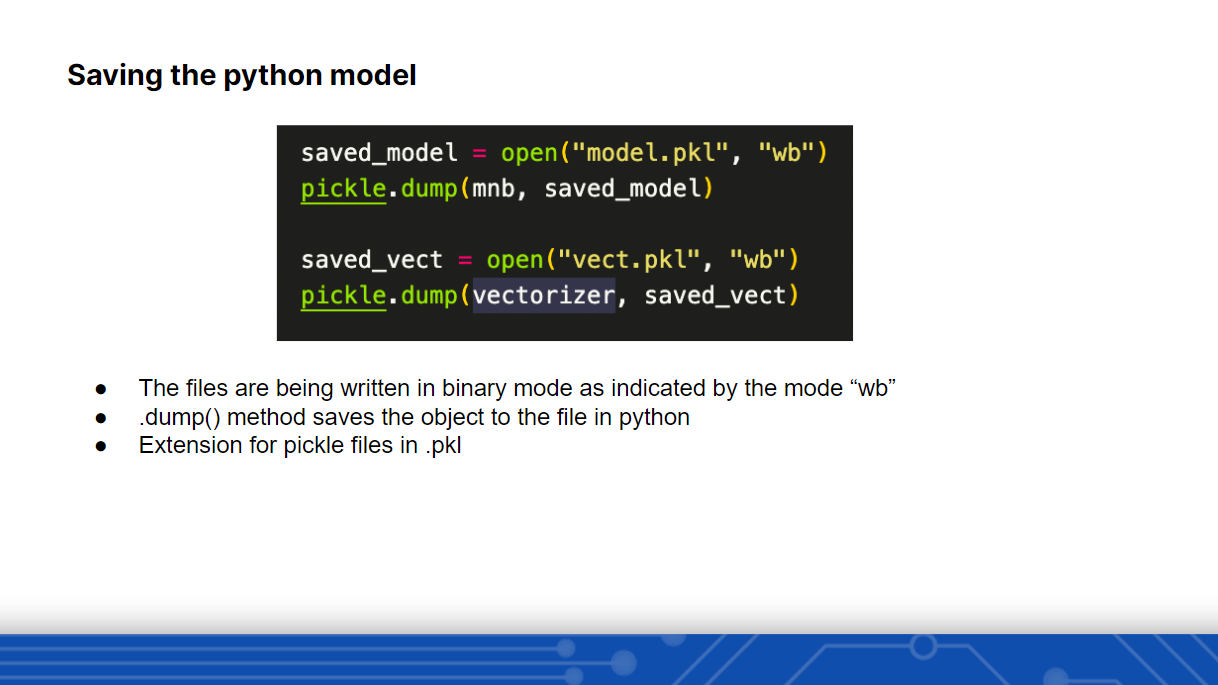
It would be very inefficient if we had to train the model every time we wanted make a prediction. To eliminate this and provide persistence, we utilized Pickle to save our CountVectorizer & Logistic Regression instances.
Using Flask to deploy our models
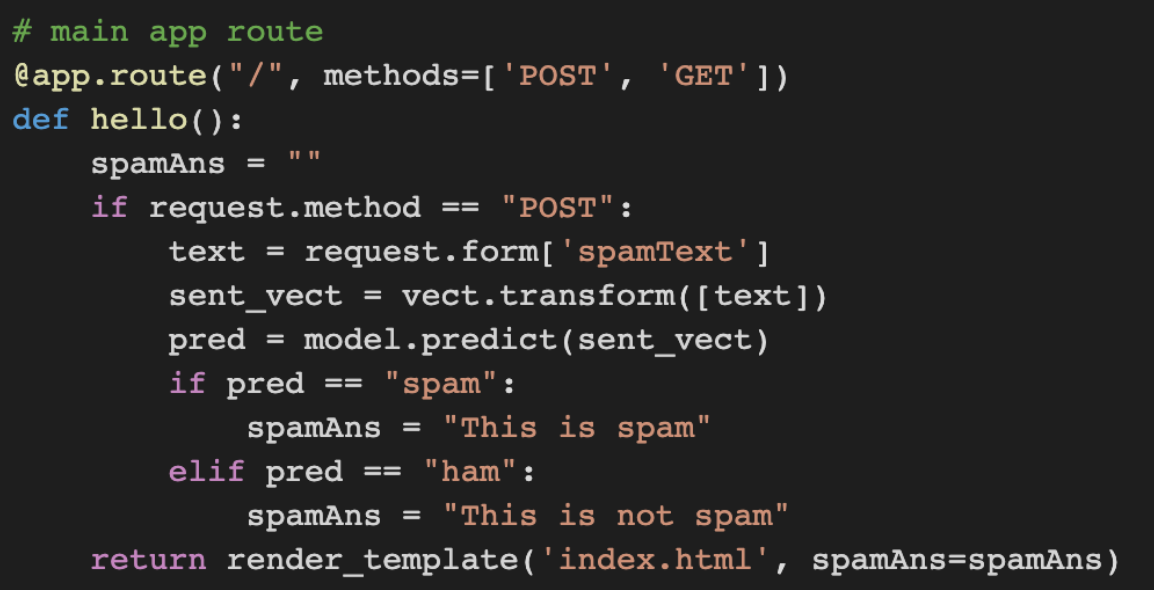
To invoke the spam text classifier using our flask website we will create an app route and a function which does 3 things.
- Collect the text entered by the user in the input field
- Convert this text into a vector using our vectorizer pickle file
- Predict whether this vector is spam or not
- Return the result to the website
The code below does these steps for us
Using Huggingface API endpoints 🤗
We used the hugging face sentiment analysis API to classify whether the given text is positive, negative or neutral.
https://huggingface.co/finiteautomata/bertweet-base-sentiment-analysis
This is the API we will be using.
To use this API we need to click on the link go to deploy and then click on accelerated inference. After that, we copy the pre-generated python code and paste it into our python file. If you are new to hugging face you will also have to create an API endpoint, to do that you may follow the steps given in the link below. (https://huggingface.co/docs/api-inference/quicktour)
After doing that we will print the variable output to check if we imported our API correctly.
[[{'label': 'NEG', 'score': 0.0017993206856772304}, {'label': 'NEU', 'score': 0.0065250033512711525}, {'label': 'POS', 'score': 0.991675615310669}]]
So with this in mind, we will pass in our own sentences and have it do the same thing. So we will be invoking this API using our flask website. To do this we will be creating a function called sentiment() that will be accessible using the /sentiment route.
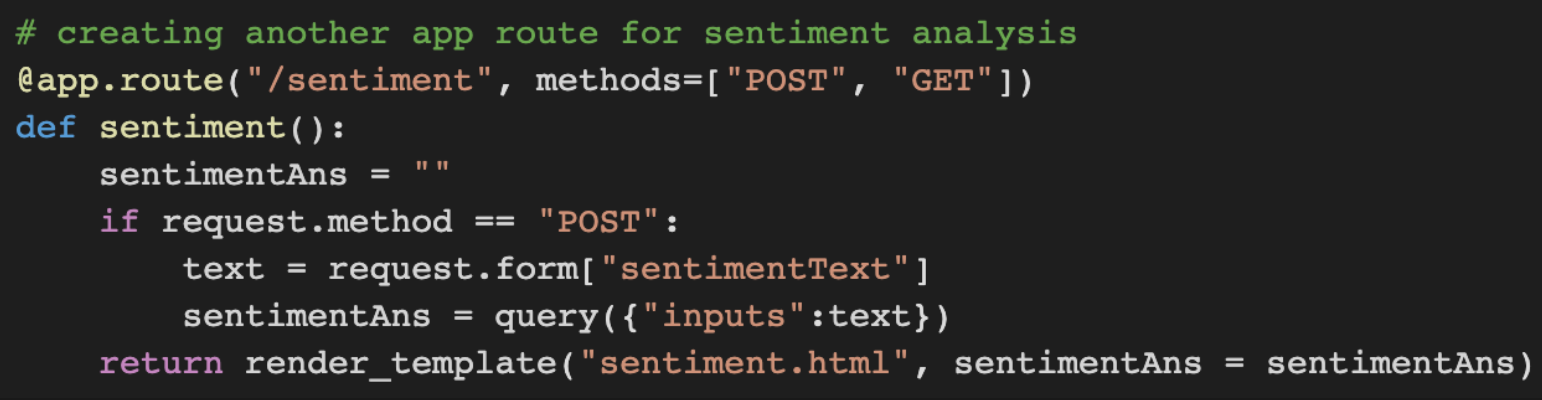
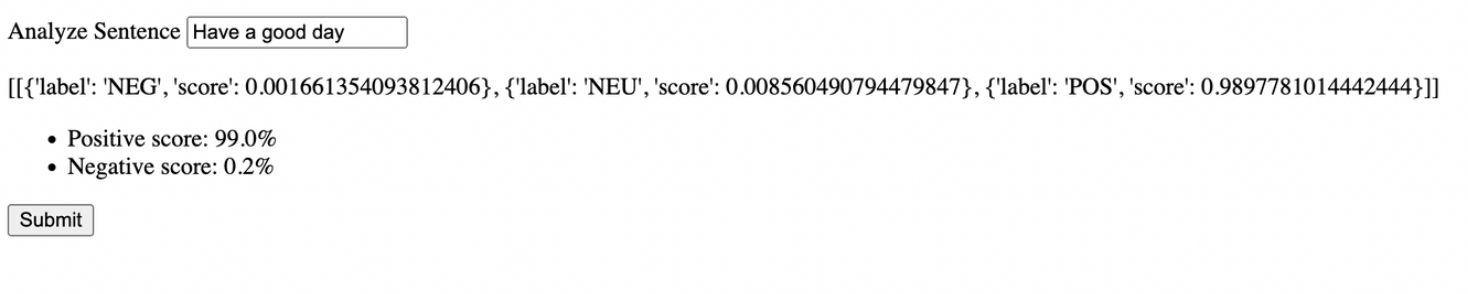
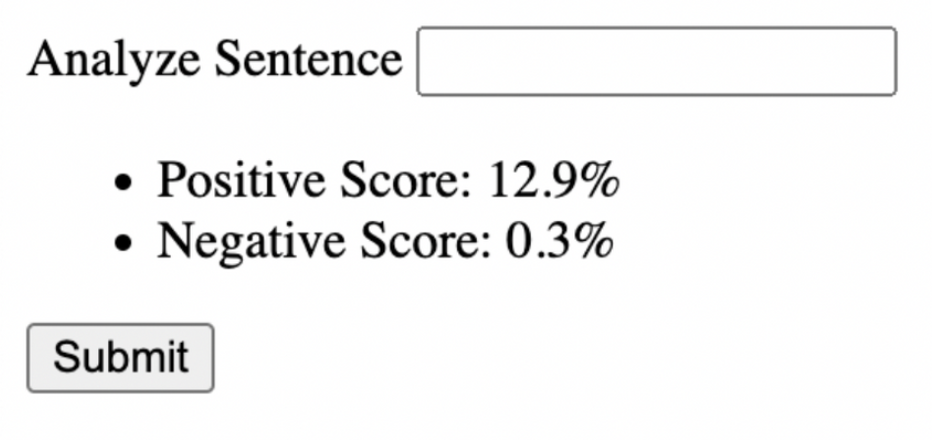
This is our output that is rendered on the website

However, this output might be a bit hard to understand for the user so we will be outputting it to make it more understandable for the user.
To do that we will create 2 empty variables pos_output and neg_output and assign the positive and negative scores to these variables respectively. The output will also be in percentages.
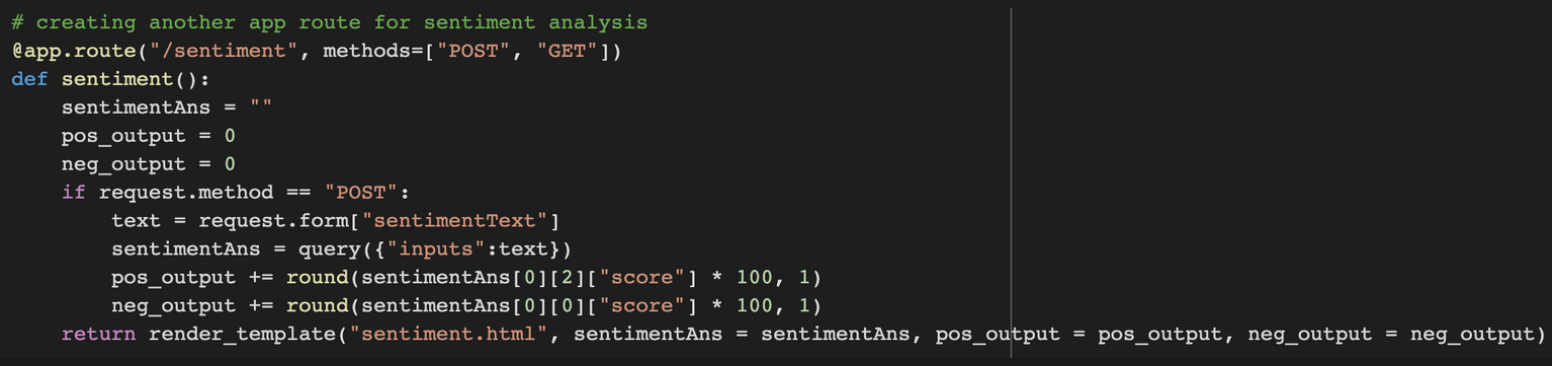
The output now looks something like this
Challenges faced while working on this project
One of the challenges was that the flask app would not work properly when using virtual environments and we had to manually keep killing the processes on the flask port. To solve this problem we used conda env and also set the app to run on a specific port.
